Special hands-on activities for the whole family while staying safe at home during the COVID-19 outbreak.
The most recent activity is on top; scroll down for activities posted earlier.
5/4/20
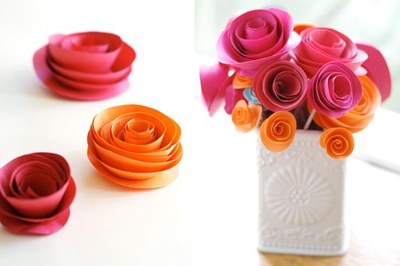
PAPER FLOWER PROJECTS ✿ DIY GIFT FOR MOM ON MOTHER’S DAY
Making handmade flowers can be a daunting task, but these step-by-step do-it-yourself ways of making paper flowers are simple and easy. You can make just one flower and place it in a simple vase for a centerpiece, or make a bouquet of various sizes and colors and patterns for a one-of-a kind style!
These three projects are shown from very easy to more elaborate.
THREE EASY STEPS PAPER FLOWERS
Step 1: Draw a spiral on a 6x6" square piece of paper. (Try different sized squares for different sized flowers, or patterned paper for a splash of a different color!)
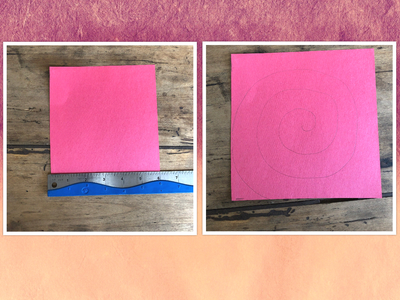
Step 2: Cut spiral out of paper. Don't worry about consistent ring sizes, the irregularity will keep it interesting.
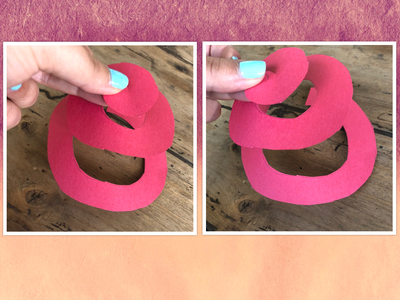
Step 3: Starting from the outside, roll the paper in until you reach the center of the spiral. When you release the coil, the paper will spring back a bit. Dab a dot of glue at the bottom to the shape. You can use a twig as a firm stem, make a small hole in the bottom of the flower base and add another dab of glue to hold the twig in place.
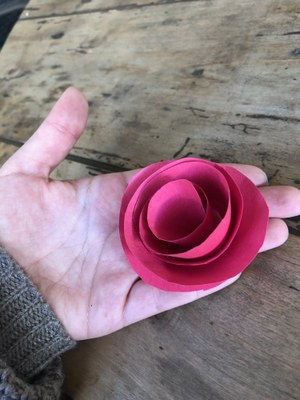
Tutorial and photos by www.santabarbarawedding.com
NOTE: You can add a rhinestone button or a pearl in the center with hot glue.
You could use this simple pattern for boutonnieres, party favors, place setting embellishments, the possibilities are endless!
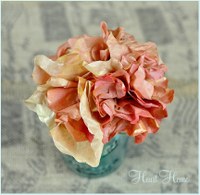
COFFEE FILTER FLOWERS
Who would have thought that coffee filters, not terribly glamorous after all, could be used to produce lovely paper flowers?
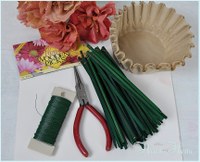
Here’s all you need:
*Natural Coffee filters
*Floral Wooden picks
*Floral Wire
*Needle Nose pliars (optional)
- Take a filter and fold like the first 3 photos below, until you have a cone shape…Now cut little scallops in your cone.
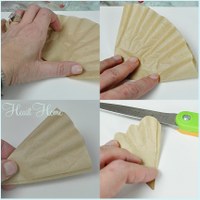
- Do the same with 2 more filters but cut different sizes when you cut your scallops. You’ll end up with a small, a medium and a large scalloped cone! Now unfold these little wonders!
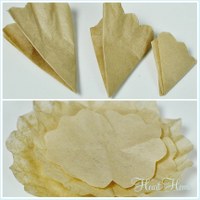
- Cut a tiny slit in the center of the 3 papers and insert your wooden floral pick (take off the thin copper wire from your pick before inserting-the wire is useless for this project.)
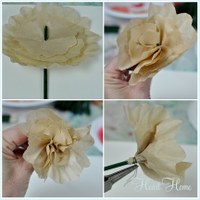
- Pinch the papers together underneath the flower…now, turn and continue pinching…can you see your flower blooming?!
- Now, cut a section of floral wire and wrap around the pinched paper under the flower around your stem…twist to secure the wire and trim.
TIP
If you like the natural flower then you’re all done but you can add color, too.
First technique : use very watered down paint (in paper bowls) in red, orange and metallic gold… simply dip the tips of the flowers in the watercolors and let the watery paint soak (just a little) into the paper to tint the flower… dip 1/2 the tips in red, then the other 1/2 in orange and then dip some of the tips in the watered down metallic gold!
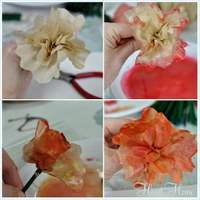
The second way : Add the color before you put the flower together.
After you’ve cut scallops in your 3 cone shapes…unfold the cones and dip the tips in the very watered-down paint colors. Here’ the colors were overlapped and when laid out to dry, a bit of metallic gold was added to the tips with a paintbrush.
Let the papers dry then follow the directions to make your flower from the already water colored paper!
The more watered down your paint is, the softer your colors will be…
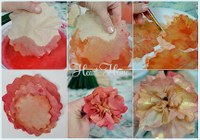
And voila!
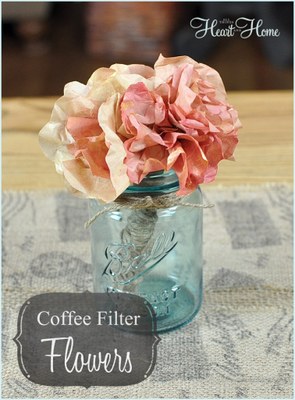
Tutorial and photos by www.allthingsheartandhome.com
PAPER PLATE FLOWERS
Turn cheap paper plates into splendidly gorgeous flowers for Mommy? Yes, please!!!
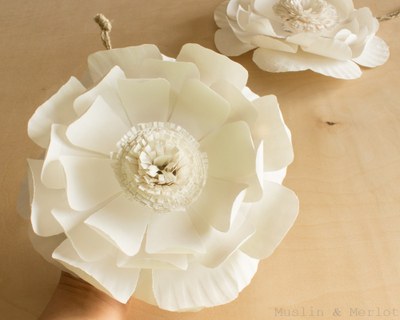
You will need:
- (5) 9-inch Paper Plates
- Scissors
- Hemp Cord or Metal Fasteners
- Round (not beveled) Pencil
- Marker or Round-Handled Wooden Spoon
- X-acto Knife
- Hot Glue Gun
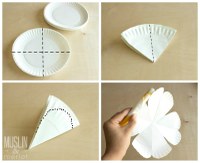
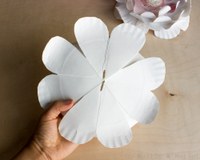
Fold paper plate on dotted lines.
Cut paper on black dots. One side will be cut deeper than the other. You'll end up with a shamrock once the plate is unfolded.
Bend each curved edge around a large marker or the handle of a wooden spoon.
Lay the first plate, curved edges DOWN.
Fold and cut three more plates, each a little smaller than the last. Cut the edges evenly, not like the first plate. Save the cut edges! We'll use those later.
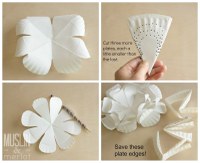
Use a pencil to curl the petals inward.
Keep the leftover edges folded together. Cut off the top and bottom edge.
Still folded together, fringe the edge. Repeat with two more leftover edges.
Press the fringe of ONE leftover edges against a wide marker.
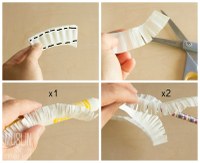
Press the fringes of TWO leftover edges against a pencil.
Use the X-acto blade to cut holes in the center of each flower.
Place a paper fastener through all the layers.
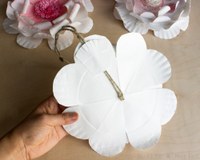
OR cut a three-foot length of hemp cord. Fold it in half. Make a knot at the folded end. Knot again once or twice.
Thread the hemp through the flower petals. The knot should be in the center of the flower.
Tie and knot the hemp at the back of the flower.
Pull the hemp straight. Knot the end.
Cut a medium piece from the fifth plate. Sandwich the hemp between the back of the flower and the medium place of plate. Glue in place.
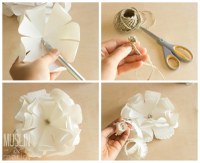
Start rolling up the pencil-curled fringe. Make sure the fringe is pointing outward.
Leave it slightly loose in the center so that it will fit over the hemp knot. Glue at regular intervals until you reach the end of the first fringe. Glue the end to the second fringe. Keep rolling. Glue third (marker-rolled) fringe.
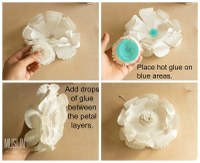
Place hot glue all over blue areas. Press and hold together until the glue cools.
Decide how to layer the petals. I offset my petals (third picture below) so that it would look like a full-blown tea rose.
Add drops of glue between the petal layers to help keep the petals in place.
TIP: Use a fan brush and watercolors to give them a pretty tinted hue.
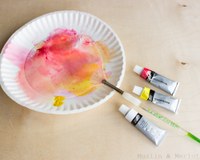
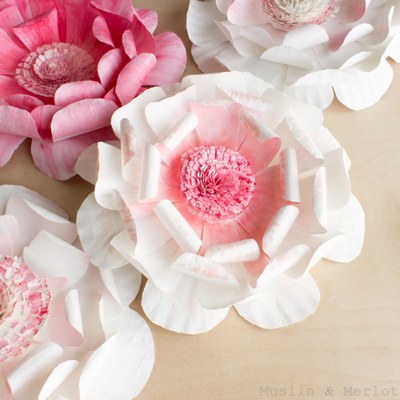
Tutorial and photos by www.muslinandmerlot.blogspot.com
Wishing all Moms a very special Mother’s Day with many lovely paper flowers!
4/28/20
INFUSED OILS
A VERY EASY CONCOCTION FOR YOUR BEAUTY CUPBOARD OR A FANCY GIFT
Making infused oils is a simple process of infusing flowers, herbs or spices into an oil by heating or letting it sit in a sunny spot so that the volatile oils can transfer into the carrier oil. You can make culinary infused oils (see process in STAY HOME ACTIVITIES - COOKING IDEAS) and, the beauty of it (😊), you can also make scent oils for use in aromatherapy, massage oils and making beauty products like soaps and lotions.
Let’s make glamor happen!
BEAUTY INFUSED OILS
You can capture the scent of flowers and herbs in infused oils. These infused oils can be used as massage oils, bath oils or can be used in making lotions, soaps or perfumes. There are several plant based oils that you can use in making infused scent oils (these are referred to as carrier oils):
|
Sweet almond oil |
Evening primrose oil |
|
Jojoba oil |
Avocado oil |
|
Apricot kernel oil |
Borage Seed Oil |
|
Olive oil |
Various nut oils (walnut,pecan, hazelnut...) |
|
Grape seed oil |
Various seed oils (hemp,sesame, sunflower...) |
These oils are easily absorbed into the skin (making them great moisturizers) and do not have a strong odor. They can be bought at health/natural food stores or specialty aromatherapy stores. Some can be found at grocery stores, but try to get cold pressed oils.
The type of flowers or herbs that you can use is really up to your imagination or what you happen to have growing in your garden, here are some suggestions:
|
Lavender |
Rose, carnation, chamomile, jasmine, violets |
|
Comfrey |
Geranium, violets, lily, sweet pea, hyacinths etc |
|
Clove |
Vanilla bean |
|
Citrus peel |
Cinnamon bark |
| Calendula | Lemongrass |
|
Pine |
Mint |
Using fresh over dried is usually better, also if you are getting them from your garden, cut the flowers/herbs in the morning and start making the infused oil right away if you can. You can mix different flowers and herbs together creating a variety of different scent combinations. The instructions for making scent infused oils are basically the same as culinary oils, though I wouldn't recommend using the heating method since flowers are more delicate than culinary herbs.
How to make:
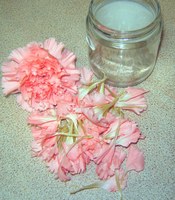
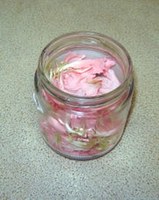
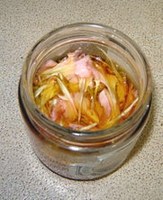
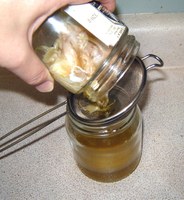
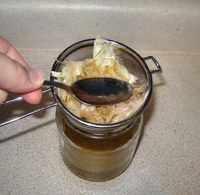
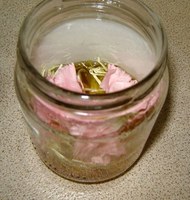
Oil recipe and photos by ChrysN at www.instructables.com
- Gently bruise, crush, or chop the flower petals, herbs, spices or peels
- Place them into clean dry glass jar
- Cover them in a carrier oil
- Place a lid on the jar and close
- Place jar in a sunny spot. Swirl or shake the jar every day or so.
- After a week drain off the oil into a clean jar using a sieve or cheesecloth/coffee filters.
- Smell the oil to see if the scent is strong enough
- If you want it stronger add more flowers(or herbs etc) to the oil, close lid and place back in the sunny spot for another week.
- Repeat as needed.
- If you are happy with the scent pour the oil in to a nice glass bottle and label. You can add a pretty ribbon and give it as a gift.
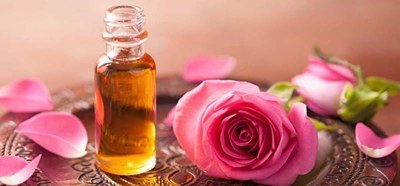
Photo: www.vitexnatura-wholesale.com
4/21/20
DON’T THROW ALL YOUR CARDBOARD AWAY! MAKE TOYS FOR YOUR KIDS (AND PET KIDS)
With the stay-at-home directives during the COVID-19 pandemic, ecommerce is booming… so is the number of discarded cardboard packages. Why don’t you recycle yours into this fun activity?
Concerned about transmission of the virus through cardboard? According to the Nationals Institute Of Health (NIH)(https://www.nih.gov/news-events/news-releases/new-coronavirus-stable-hours-surfaces), “The scientists found that severe acute respiratory syndrome coronavirus 2 (SARS-CoV-2) was detectable (..) up to 24 hours on cardboard”. Therefore, only use older cardboard boxes.
Cardboard Marble Labyrinth
This is a fun and easy to make game that you can spend time with for hours during confinement.
Supplies:
- Cardboard
- Marble
- A knife
- Glue
- A ruler
- A knife
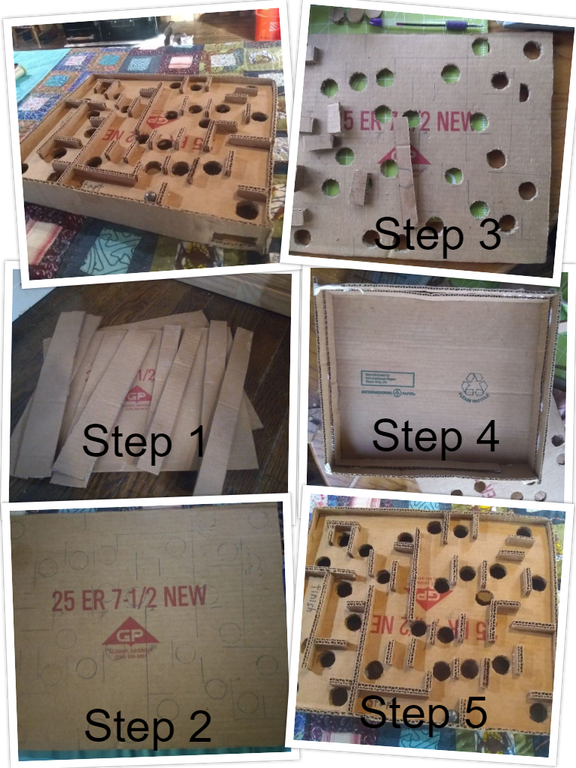
Photos by Jonathane Dunlop at instructables.com
Step 1: Measuring and Cutting Out Your Cardboard.
Cut out two pieces of cardboard that are 12'' by 14''. Then you need four pieces two inches wide, two of them fourteen and a quarter long and two of them twelve inches long. After that you cut out four more that are an inch and a half wide, two of them fourteen inches long and two of them twelve inches long. Finally, you cut out several strips that are a quarter of an inch wide.
Step 2: Making Your Design
Draw out where you want your holes and walls on one of the twelve by fourteen-inch cardboard pieces. Make sure you can get from the start to the finish.
Step 3: Cutting Out the Hole and Making the Walls
After you have your design made you cut out the holes. It helps if your knife is not to wide for this. Then you measure the lines you drew and cut them to length out of the quarter inch strips that you made before. Once you have those cut out you can glue them on top of the lines and wait for it to dry.
Step 4: Building Your Base
Now you get your second twelve by fourteen-inch cardboard and glue the two-inch-wide strips around the outside of it. Next you glue the inch and a half wide strips around the inside of it. Then cut a hole in one of the corners for the marble to get out and set it out to dry.
Step 5: Put the Top with the Base
Once the top and bottom are dry you put the top in on top of the base and glue it there. For finale touches you can write where the start and finish are.
Get your marbles and enjoy playing!
COPYCAT 😸 ‘Peek-a-Prize’ Cat Toy

Items and tools
- one empty cereal box (or any narrow cardboard box)
- some tape to seal ends, also to anchor the toy on the floor once finished
- blade to cut
- an empty toilet paper roll to draw shapes
- a pen to draw
- trace the shape on the box
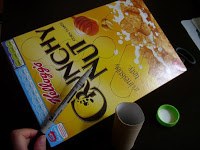
- cut out the shapes
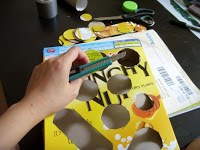
- drop cat toys into the box with holes
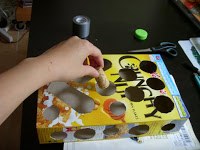
DONE!
TIP: Better to tape it down to the floor for better play. (Otherwise, the box is too light, it can fly across the room in one kick.)
AND MORE… thread a string through the circle cut-outs, and turned them into toys, too!
Photos and instructions by My Daily Obsessions
Paw-some!!!
Foraging toy for Doggo
Shoebox Hide-and-Seek
Try doing some scent work in the house. All you need is a set of empty containers like shoeboxes or small cardboard boxes.
Place the containers in a group on the floor and bait one or a few with smelly treats. Then allow your dog to sniff all the containers in a search for the hidden treasure.
In the beginning, you can make your dog’s job easier by poking holes in the tops of the containers.
Once your dog has the idea, start increasing the challenge by only baiting one of the containers and spreading them out around the room.
In addition, the more containers your dog must search through, the greater the effort required.
ALTERNATIVE: Fill one box in with a layer of either old shirts, towels, blankets, or anything else you don’t mind getting a little slobbery. Stuff some more treats and more towels until the box is filled. Watch as your dog searches through the box for their reward!
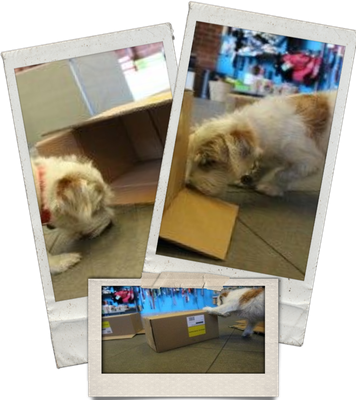
Photos by Angela Brittain
“If you think dogs can’t count, try putting three dog biscuits in your pocket and then give him only two of them.” — Phil Pastoret
4/14/20
MAKE YOUR OWN ‘LEMISHINE’ COPYCAT DISHWASHER CLEANER AND DETERGENT BOOSTER!
In these coronavirus ages, it is important to destroy or at least reduce the number of germs lingering around your food and in your kitchen and therefore, use your dishwasher whenever possible. And because everyone is now back home, you have to run it much more than usual!
We have found a quick and easy recipe on how to make your own dishwasher cleaner and dishwasher detergent booster* within minutes at a low cost, without the need to go out shopping (just order the ingredients on the internet)!
*A dishwasher cleaner is used to clean your dishwasher: it will make it wash better, smell better and can prevent overflows. A detergent booster is used in conjunction with dishwasher detergent to better clean dishes and give them a sparkling finish. One of the best brands is LemiShine.
DISHWASHER CLEANER RECIPE “LEMISHINE STYLE”
Ingredients
- 1 & ⅓ Scant Cups Citric Acid
- ⅔ Cup Baking Soda
- 2 tsp Lemon Essential Oil
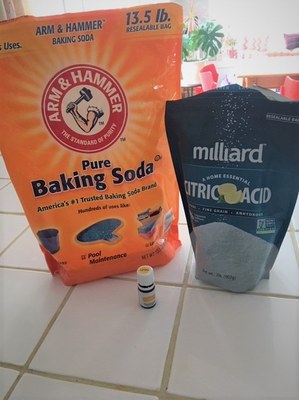
Instructions
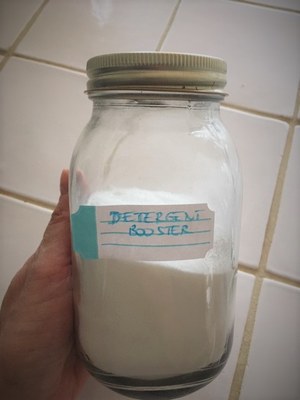
- Add the ingredients to a food processor. Process until well mixed, only takes 15-30 seconds. Let the powder settle and then scoop the mixture into a wide-mouth pint jar to store.
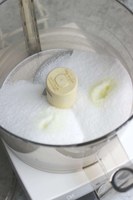
- To use: Add ¼ C to the bottom of an empty dishwasher. Run on a normal cycle. Repeat monthly to maintain cleanliness.
- *The name-brand stuff says that you may need to double the amount on your first try if your dishwasher is in really bad shape.
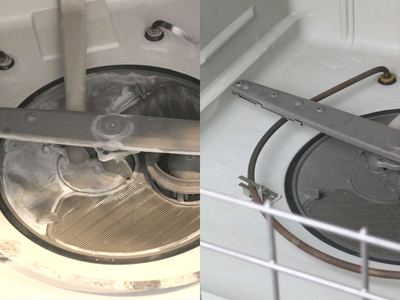
Before After
Notes
This is a non-food recipe. It is meant to be a cleaning product. Do not eat!
If it clumps a little bit between uses, just loosen it up with a fork and use as normal.
Use once a month to keep your dishwasher free of grease, scum and smells: simply put some cleaner at the bottom of your empty dishwasher and run on normal cycle.
DETERGENT BOOSTER RECIPE “LEMISHINE STYLE”
*This recipe is for a detergent additive in a dishwasher. NOT to be consumed!*
PREP TIME 5 minutes
ACTIVE TIME 2 minutes
TOTAL TIME 7 minutes
DIFFICULTY Beginner
INGREDIENTS
- 2 Cups Citric Acid
- 1 to 1.5 Teaspoon Lemon Essential Oil
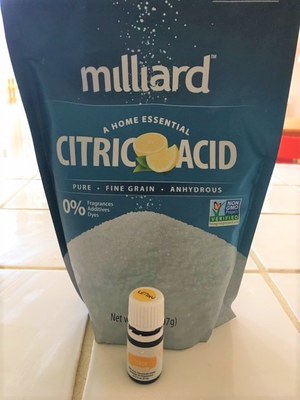
Both ingredients can be found on amazon. Food grade citric acid and organic lemon essential oil are recommended for best food grade results.
TOOLS
- Food Processor
- Pint Jar
- Plastic pour lid for pint jar
INSTRUCTIONS
In the bowl of a food processor, add the citric acid and the lemon essential oil. Then add the lid and process for about two minutes. (You can use a bowl and whisk if you do not have a food processor, it will just be a little clumpy).Let the powder settle before you open it, unless you want a painful whiff! Then add to a pint sized jar with a lid.

To use: Add it to the main detergent container in your dishwasher and then use your regular detergent in the pre-wash side. Wash as normal, though I usually choose a heavy/pots and pans setting.
NOTES
Please be careful not to use this with painted, enameled, or non-stick dishes because that is the warning on the real product…which makes sense, it is very abrasive and would definitely clean things off a little better than you would want. So, my advice is to only use it for plain glass, metals with no “non-stick” stuff on them, and any plastics that are looking dingy…like the kids cups and plates that always get looking gnarly.
PS: We made the booster and tried it... it works really well!
Both recipes were found on the blog: www.lifeshouldcostless.com.
Photos by Florence Rouquet and Life Should Cost Less.
4/9/20
WINDOW ART FOR KIDS (AND BIGGER ONES, TOO)
There’s something quite wonderful about making art while watching the wind, rain or snow swirl around on the other side of the glass. And even more wonderful, especially these days when the only activity we can still do outside is walk and look around, is to see the fantastic messages and colors popping out of family houses’ windows!
Window art seems just like the thing to combat dreary days.
Here are a few inspirational photos.
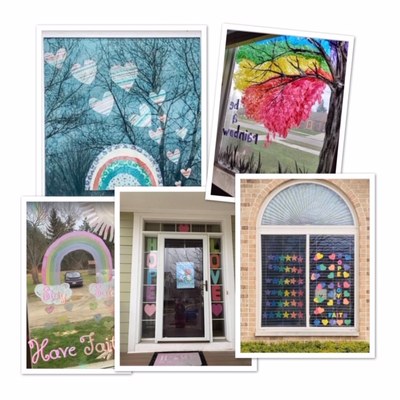 Photos from local Instagram and Facebook accounts
Hey! How about making your own, too?
RAINBOW WINDOW ART
Create a rainbow window by sticking colored cellophane directly on the glass using a solution of diluted dish soap. No sticky paper required!
To make your own DIY rainbow window, you’ll need:
All you need is:
- Colored cellophane (found on amazon, for example) cut into a variety of shapes or strips (you could easily customize this for any theme, like snowflakes for winter or hearts for Valentine’s)
- A solution of 1 part dish soap to 2 parts water. Err on the side of too much soap, rather than too little soap.
- A paint brush or sponge roller
- Towels for clean-up
- Enthusiastic children
First, decide if you or your kids are going to cut up the cellophane. This really depends on the level of interest your kids have in crafty stuff. At any rate, make sure that they don’t spend too much time on this activity as they will miss out on the actual fun part – painting!
Paint the window with the soap and start to apply the cellophane. You want the window really wet. If it dries, just apply more soap (put towels on the sill and under the kids’ feet).
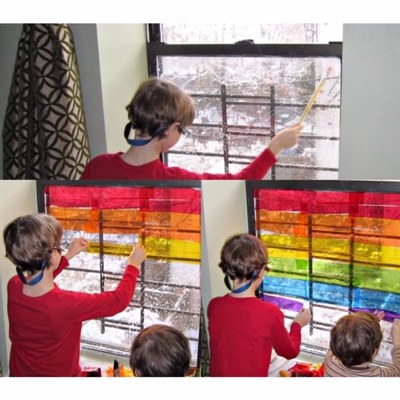 Photos and activities rom https://handsonaswegrow.com/rainbow-window-art-kids/
FAUX STAIN GLASS RAINDROP SUN CATCHERS
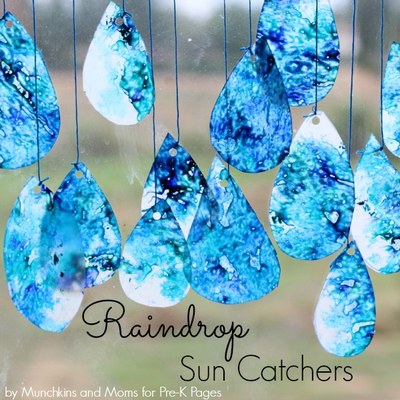 Photos and activity by https://www.pre-kpages.com/raindrop-suncatchers-fine-motor-art/
- Blue crayons
- Pencil or crayon sharpener
- Waxed paper
- Iron (for adult use only)
- Scissors
Peel the crayon, then sharpen them on top of a large sheet of waxed paper; as you sharpen, spread the shavings evenly around to take up space on the waxed paper.
Cut another sheet of paper equal in size to lay on top of the shavings.
Use an iron on the lowest setting to iron directly on top of the waxed paper and melt the crayon shavings. It only takes a quick swipe of the iron to do this. The wax immediately melts and cools rather quickly.
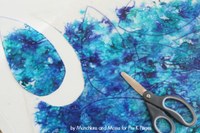
You can then draw raindrop shapes (or any shapes, in any color!) on the paper and cut them out.
Use a hole puncher and embroidery floss to string them up in windows for display! These raindrop suncatchers look like wind chimes made of colored glass. Beautiful!
COLORFUL WINDOW FROSTING
Make as many containers as colors you are planning to use.
- Mix 2 parts liquid dish soap to 1 part cornstarch for one container.
- Stir the ingredients with a craft stick, stir stick or plastic spoon until the cornstarch
- The proportions need not be exact; add more soap or cornstarch as needed until the mixture is about as thick as latex or acrylic paint.
- Add food coloring
- Put masking tape at random on a window, paint, let dry, remove the tape without waiting to long and voila! A great frosted stained-style window!
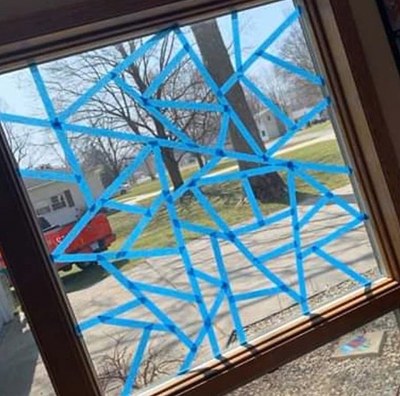
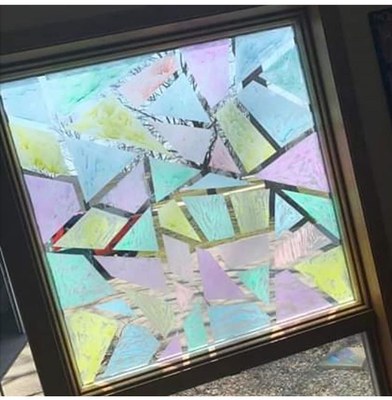
Photos by Nottawa Township Library.
4/1/20
BATH BOMBS WORKSHOP
For our first #StayatHome #StayBusyandHappy activity, we have been inspired by the Adults & Teens Workshop we did back in March 2018 with Karine and Kelly: how to make BATH BOMBS.
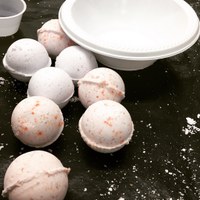
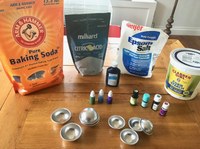
Ingredients and utensils - all can be found at Meijer’s or Amazon.
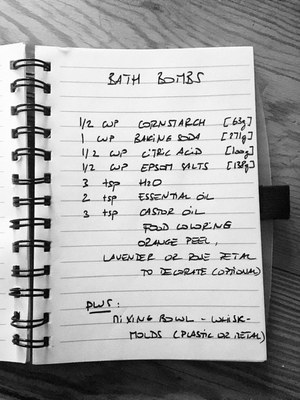
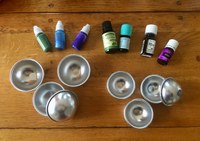
We used special metal bath bombs molds ordered on amazon, but you can use anything flexible as a mold, so have fun looking around your home for things you could use. Here are some ideas to get you started:
Yogurt or pudding pots
Christmas tree decorations
Easter egg packaging
Silicone ice cube trays
Silicone cupcake cases
Plastic biscuit cutters (place them on a tray)
Method:
-
Put the bicarbonate of soda, citric acid, cornflour and Epsom salt into a bowl. Whisk until all the ingredients are combined.
-
Pour the castor oil, essential oil(s) and food coloring in a small bowl. Mix together well, combining the oil with the coloring as much as possible.
-
Very slowly add the oil mixture into the dry ingredients a little at a time, whisking between each addition. When all the oil is added, add water while whisking again (it will fizz when you add the water, so mix it in quickly). You're looking for the mixture to slightly clump together when pressed in your hand and keep its shape – it shouldn't be too wet.
-
If you're adding peel or flower petals to decorate, drop them into the bottom of your chosen mold. Pack your mixture tightly on top, pressing down and smoothing out the top with a teaspoon.
-
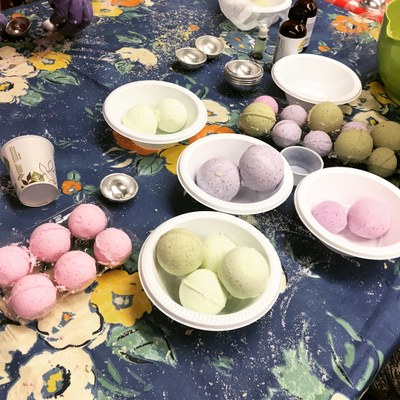
Leave your bath bomb in the mold to dry for 2-4 hrs, then carefully remove it.
Ready to drop into your bath. Watch it fizz away and enjoy the scent and color!

