Special fun, easy and anti-waste recipes while staying safe at home during the COVID-19 outbreak.
The most recent recipe is on top; scroll down for recipes posted earlier.
3/11/21
Carrot Cake Easter Bunnies
by our favorite French Chef Cyril from Paris
At Easter, we're going to eat chocolate, a lot of chocolate: bad time for our figure! Let’s not even start talking about kids.
I tried to find a fairly healthy and chocolate-free dessert. I was inspired by rabbits. As rabbits are associated with Easter and they eat carrots, I wanted to stick to the theme by making a carrot cake base. This is how to use fruit and vegetables in disguise in a delicious Easter dessert!

FOR 9 RABBITS I PREP: 20 MIN I COOKING: 20/30 MIN
INGREDIENTS:
For the Carrot Cake:
- 250g carrot
- 1 Golden Delicious apple
- zest from one lemon
- 70g hazelnuts, coarsely chopped
- 2 eggs
- 2 pinches of salt
- 100g sugar
- 150g flour
- 60g sunflower oil
- 1 tsp cinnamon (4 g)
- 1 tsp nutmeg powder (3 g)
- 1 tsp liquid vanilla extract or vanilla powder
- 8g baking powder
- A few raisins (30 g) depending on your taste.
For cream cheese icing:
- 90g cream cheese
- 40g soft butter
- 80g confectioner’s sugar
- zest from one lemon
For the ears:
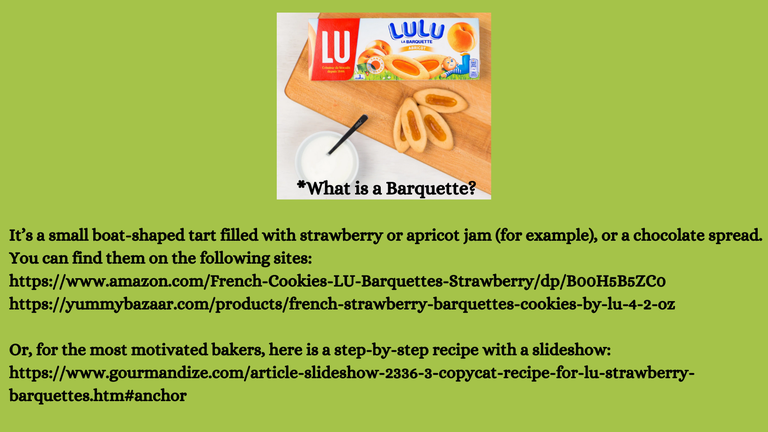
- 18 chocolate, apricot or strawberry “Barquettes”*(see below)
For eyes and lips:
- White sugar paste (fondant icing)
- Colorful sugar beads
9 toothpicks (to hold the ears)
Prepare fruits and vegetables.
- If your vegetables and fruits are organic, grate the carrots and apple with the skin. If not, peel them.
- Mix grated carrots and apples.
- Zest a lemon and mix.
Prepare the dough.
- In a bowl, whisk eggs with sugar and salt.
- Add the oil. Whip.
- Add flour and yeast.
- Mix well.
- Add cinnamon, nutmeg and vanilla.
- Stir in carrot/apple mixture and add crushed hazelnuts.
- Oil 9 muffin cupcake paper cups and place on a baking sheet.
- Fill them with 3/4 mixture and cook at 160oC/320oF for 20 to 30 minutes
Prepare the cream cheese icing
- In a bowl, whisk together cream cheese, almost melted softened butter, sugar, lemon zest.
- Put in a piping bag.
Make your rabbit decoration
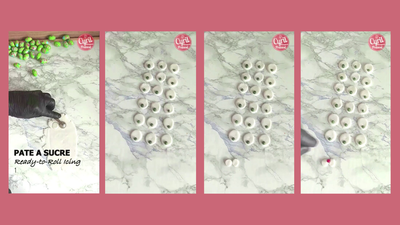
- In the sugar paste, imprint 18 circles for the eyes. These circles must be bigger than those for the lips. Gently layer 2 circles, and at the bottom of each circle, paste 1 pearl of colored sugar to make the pupils.
- Imprint 18 circles of sugar paste, smaller than the eyes, for the lips. Glue 2 circles side by side making them overlap slightly and stick a pink sugar bead at the top in the middle to make the nose.
- Cut the base of each “barquette’ at the jam limit to make the ears.
- Insert a small piece of toothpick in order to hold the ear on the muffin. Don't forget to mention that there is a small piece of toothpick in there!
Prepare the rabbits
- Spread the icing on each cooled muffin using the piping bag.
- Place your eyes and your lips.
- Plant your ears on each side and you have some pretty Easter bunnies.
- Keep in the fridge until serving.

Photos: Cyril Rouquet-Prevost; translation: Florence Rouquet
12/15/20
LET IT DOUGH!
YOUR FAMILY BATTERS: EASY-PEASY HOLIDAY COOKIES
Cookies are pretty much the best part of Christmas, right? Whether you're making them for a party, Santa, or just a cozy night in by the fireplace, there's always a reason to whip up a batch of cookies during the holidays. We've called back our favorite Chefs Cyril and Karine and asked them to each make an easy-yet-tasty recipe for our favorite Franklin families. And why not ask your Teens to get their hands dirty (with cookie dough), for once?
Shortbread Cookies Holiday Wreath
by Chef Cyril Rouquet from Paris - http://www.cyrilrouquet.com/kitchencrise

FOR 1 WREATH (AND A FEW SHORTBREADS AS A BONUS) I PREP TIME: 20 MINUTES I BAKING TIME: 10 MINUTES
Ingredients
- 250g flour (2 Cups)
- 125g butter (4.41oz)
- 125g sugar (4.41oz)
- 100g ground walnuts (0.81oz)
- juice and zest of 1 lemon
- 1 egg
To decorate
Royal ice:
- 200g confectioners’ sugar (7.05oz)
- egg white
- 1 dash of rum
OR: white chocolate:
- 200g melted white chocolate
- Food colors of your choice
Prepare the dough.
- In a bowl, mix all the ingredients. Form a ball and wrap it in film, put it in the refrigerator for at least 2 hours.
Prepare the wreath.
- After 2 hours, cut the dough in 2 equal parts.
- Roll out the first dough ball.
- Make the base of the crown on parchment paper with two big round cake cutters. The first round should be about 18-20 centimeters (7-8 inches), the second (inside part), should be smaller than the other (about 13-15 centimeters).
- Roll out the second dough.
- Make stars with a star shaped cookie cutter.
- Place the stars on the wreath make with the first dough, alternating them (one under, one above, etc.). Do not put too many layers: the stars may lose their shape and won’t bake properly (see picture).
- Put the wreath in the fridge for 1 hour. It is important to follow this step, otherwise the crown may shrink.
Preheat the oven to 160oC/320oF
Bake your shortbread.
- Bake on a baking sheet for 8 to 10 minutes.
- When out of the oven, sprinkle with confectioners’ sugar.
- Decorate the stars with royal ice cream (mixing all the ingredients), or melted and colored white chocolate.
- Put a candle in the center and you will have a beautiful gourmet Holiday wreath!

C'est Noël c'est Noël c'est Noël!
Photos: Cyril Rouquet-Prevost; translation: Florence Rouquet
Holy Moly Holiday Cracks!
by Chef Karine from www.cuisinealakarine.com
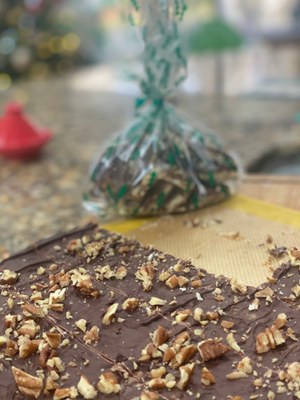
4 ingredients turn into unbelievable treats!
Ingredients
- 1cup dark or light brown packed brown sugar
- 1cup dark or semi sweet chocolate chips
- 1cup butter (4 sticks)
- 40 Saltine crackers
- Toppings: nuts, granola, mini marshmallows, coconut, anything... sprinkles...
Instructions
-
Set oven temp to 350 F
Get a sheet tray (cookie sheet) and line it with parchment paper or a Silpat mat.
Lay crackers side by side
-
Melt butter and brown sugar- bring to a boil for about 1 minute while constantly mixing. Pour sugar solution on saltines. Bake for 5 minutes.
-
Sprinkle chocolate on top and let sit for a minute or two... spread evenly when melted.
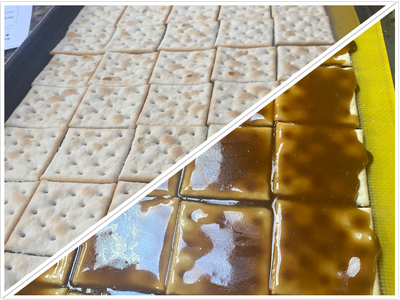
Photos by Karine Snyder.
Add whatever toppings you want...This is very sweet already, so if you want to off set the sweetness add dried cranberries, or lots of nuts...
-
Place in refrigerator to set and harden at least an hour.
-
Peel parchment and place on a cutting board. Either cut even pieces or crack it randomly
-
Keep for 1 week covered at room temp or in fridge... or freeze for up to 4 months.
Warning: Highly Addictive!
HEALTHY GREEN SMOOTHIE
We have asked Katie Ruffino, who just graduated in Biomedical Sciences and is doing a Master's Degree in Physician Assistant studies at Marquette University, if we could use her personal recipe of a very healthy smoothie.
Katie introduces herself: "Katie, aka sunnysidekt, loves everything about healthy cooking and wellness. She spends most of her time creating culinary art in the kitchen, practicing yoga, and spending time with her family and friends. Her recipes often consist of nutrient-dense ingredients that nourish you from the inside out. She is currently obtaining her masters in Physician Assistant Studies at Marquette University in Milwaukee, Wisconsin. She believes that food is medicine and plans to incorporate nutrition into her practice as a PA. Stay tuned for more recipes and helpful wellness tips. Check out her instagram (@sunnysidekt) for inspiration!"

- 1/2 frozen banana
- Large handful of spinach
- 1/2 green apple
- 1/4 avocado
- 1 Tbs almond or peanut butter
- Juice of 1/2 lemon
- 1 cup almond milk or coconut water
- (1 scoop plant based protein powder)
- (1 dried date or tbs of honey if you want to add sweetness)
5/6/20
SPECIAL MOTHER'S DAY BAKING
Lucky Franklin Public Library Mothers are being treated to TWO special recipes from our favorite Chefs Cyril and Karine. Cyril created a special, very royal Cheesecake, and Karine is sharing her recipe for 'super easy Waffles'. Anybody ready to take up the challenge to bake both???
NOTE:
Don't forget to visit their blogs (Cyril has started to do his videos and translated some recipes in English).
For Cyril: http://www.cyrilrouquet.com/stay-at-home-kitchen-translated-recipes
For Karine: https://cuisinealakarine.com/
They also have pages on Instagram and Facebook. We encourage you to follow these two gourmets and cooking enthusiasts!
STRAWBERRY BAVAROYAL CHEESECAKE
This is a special Mother’s Day recipe from Chef Cyril, whom I urged on to create for YOU, Franklin Public Library patrons, for Mother’s Day (the French Mother’s Day will be on June 7th this year). So, you are the first ones to be able to see and try this recipe! In French, Cyril called it a Cheese Royal Cake, however, a Royal Cake is something entirely different in American Cuisine. So, I came up with ‘Strawberry Bavaroyal Cheesecake’, which is very much Cyril-style in my opinion! This cake is a combination between a Cheesecake and a Bavarois, and does not need to be oven baked. The result, a layering of several textures, is stunning.
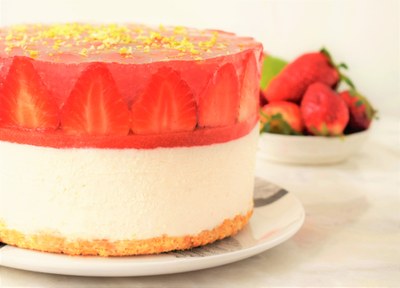
This cake is very easy to make – don’t get frightened by the long list of ingredients and steps!
Read the whole recipe carefully first.
Make sure each element cools down and sets properly.
You can make, the cheesecake base (crust, strawberry sauce and the ‘Bavaroyal Cream’) ahead of time and freeze it. Keep the remaining strawberry sauce in the fridge. You’ll only have to make the strawberry and the lemon jellies on Mother’s Day (or the day you plan to serve the Bavaroyal Cheesecake).
No time to prepare ahead? Make the cheesecake base in the morning, and the jellies in the afternoon, 3 hours before serving.
Quantities serve 4, with a 6-inch round cheesecake/cake pan.
Ingredients (for a 6-inch cake pan):
Convert ingredients here: https://www.thecalculatorsite.com/cooking/cups-grams.php
Crust
- 120g shortbread cookies or sugar cookies (or graham crackers if that’s what you prefer! We don’t use them in France)
- 40g melted butter
- Zest of 1/2 lime
Strawberry sauce
- 250g strawberries
- 40g sugar
- 15g lemon juice
‘Bavaroyal’ sauce
- 200g cream cheese
- 90g creme fraiche
- 30g sugar
- 30g milk
- 6g gelatin sheet (or powder if you prefer)
- 80g strawberry sauce
- 200ml heavy whipping cream
- 15 g sugar (no mistake here, read the whole recipe first and you’ll see)
- Zest of 1/2 lime
Strawberry jelly
- 150g strawberry sauce
- 35g water
- 5g gelatin sheet (or powder if you prefer)
Lemon jelly
- 200g water
- 10g lemon juice
- 40g sugar
- 7g gelatin sheet (or powder if you prefer)
15/ 20 small or medium-sized strawberries for decorating and 1 lime
FIRST PART
Make the strawberry sauce.
- This sauce will be used to make the ‘Bavaroyal’ cream and the strawberry jelly.
- Cut the strawberries in 4, put them in a saucepan. Add sugar and lemon juice. Stir. Bring gently to a boil without ceasing to stir. Take the pan off the gas as soon as it starts boiling. Blend the mixture and strain to get rid of the strawberry seeds. Set aside.
Make the crust.
- Crush the cookies to crumbs. Transfer to a bowl, then pour over 40g melted butter and the zest of ½ lime.
- Line a 6-inch cheesecake pan with baking parchment, bottom and side – make sure the paper goes higher than the pan by at least 2 inches.
- Pour cookie batter into the prepared cheesecake pan and press firmly down into the base to create an even layer. Chill in the fridge.
Prepare the ‘Bavaroyal’ cream.
- Place the cream cheese and creme fraiche in a bowl. Beat.
- Add sugar and the zest of ½ lime. Blend well.
- Heat milk until lukewarm. Dissolve gelatin in 1 tbsp of cold water, then pour them in the milk. Add to the cream mixture and beat.
- Take 80g of the strawberry sauce and add to the mixture. Stir well.
- Whip the heavy whipping cream until firm, with 15g of sugar. Add delicately to the mixture.
- Spoon mixture onto the crust, until the top is smooth with no bubbles. Set in freezer for 2 hours.
This first part can be made ahead of time (eg. one day before or more). Freeze the ‘Bavaroyal Cheesecake’ and set the remaining strawberry sauce in the refrigerator. You’ll only have to prepare the two jellies on the day you will serve this dessert.
Otherwise, make it in the morning and the jellies in the afternoon (3 hours before serving).
SECOND PART
Strawberry jelly.
- Weigh 150g of the strawberry sauce (made earlier). Warm up 35g of water until lukewarm and add the dissolved gelatin (dissolved in cold water as previously). Mix into strawberry sauce and pour on the frozen cheesecake.
- Place in refrigerator.
Lemon jelly.
Dissolve gelatin in 1 tbsp of cold water. Bring 200g water, lemon juice and sugar to a boil. When it boils, take off the gas. Stir in the gelatin and let cool (don’t put in the fridge).
Decorate the cheesecake.
- Cut part of the strawberries in 2. (Evaluate the quantity to go around the cake).
- Remove the Bavaroyal Cheesecake from refrigerator.
- Set the strawberries around on the strawberry jelly, larger part of each strawberry on the jelly and cut, flat part against the pan. Once this ‘crown’ ready, fill up with all the other uncut strawberries, larger part on the jelly.
- Sprinkle lime zest on top.
- Slowly pour the lemon jelly on top until it tops the strawberries’ tops. Cool in refrigerator. As soon as the jelly is set, take the cheesecake out of the pan (it’s easier to do so when the crust is still slightly frozen), get rid of parchment paper and let completely thaw in the fridge before serving.
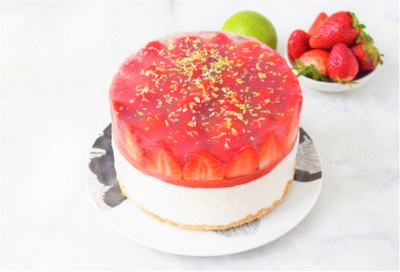
OOOH LA LA!!! Royal!
Translation: Florence Rouquet
Photos by Cyril Rouquet-Prevost
Mother's Day Waffles
Karine has just posted this 'super easy, yummy recipe for a nice mother's day brunch in quarantine' on Cuisine a la Karine. She writes : "Looking for ideas for a Mother’s Day brunch? Try these super easy waffles. They are great for breakfast, brunch or even a quick snack. We make triple the recipe and then freeze individual packs to have for later. My son loves having them as an after school snack, or at the moment “a home- school break!” He just pulls one out of the freezer and pops it in the toaster oven, and voila, satisfaction!
I love it with powdered sugar, just like how they serve it at the little gaufres stands at the beaches in Normandy. It’s such a sweet, summer treat!".
Ingredients
- 2 cups cake flour. Use AP if none, but cake flour is best
- 2tsp baking powder
- 1/2 tsp salt
- 4 large eggs - separated
- 2 tbsp sugar - caster is best here
- 1 tsp vanilla extract or paste
- 4 tbsp melted butter- Plugra/ Kerrygold best
- 2 cups milk whole milk best
- non-stick cooking spray
Instructions
-
Preheat waffle iron
-
In a medium bowl stir the flour, baking powder and salt
-
In a second bowl use the wooden spoon and beat the egg yolks and sugar until a pale yellow-ribbon like consistency-use electric beaters if possible
-
Add the vanilla, melted butter and milk to the eggs... whisk to combine
-
Combine the egg mixture to the flour-whisk till combined, don't overmix!
-
In a third bowl beat the egg whites with an electric mixer until soft peaks form-about 1 minute
-
Using a rubber spatula, gently fold the egg whites into the waffle batter-don't overmix!
-
Coat the waffle iron with non-stick cooking spray and pour enough batter in the iron to cover the waffle grid.
-
Close and cook about 3-4 minutes-serve immediately with powdered sugar, maple syrup or a preferred jam or jelly
 Mommy, I love you a waffle lot!
Photo: Karine Snyder
4/28/20
INFUSED OILS
A VERY EASY CONCOCTION FOR YOUR PANTRY OR A FANCY GIFT
Karine from Cuisine a la Karine is back! Ever the creative cook, Karine suggested this easy cooking workshop to us, and to play along, she has made and posted a recipe which you can find on www.cuisinealakarine.com .
Step into any specialty food shop and you'll see shelves of fancy vinegars and flavored oils. While the sleek packaging (such pretty bottles!) and infinite flavor combinations make them tempting purchases, it's far less expensive to make your own! Plus, they make superb host/hostess gifts.
Making infused oils is a simple process of infusing flowers, herbs or spices into an oil by heating or letting it sit in a sunny spot so that the volatile oils can transfer into the carrier oil.
Let’s make a flavorful concoction!
CULINARY INFUSED OILS
Material
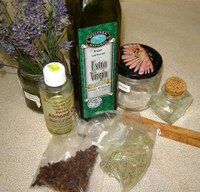
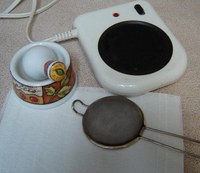
- Oil (I will discuss the different types to use in Steps 2 and 5)
- Herbs, spices, flowers
- Clean, dry glass jars
- Clean decorative glass containers
- Coffee filters, cheesecloth, sieve
- Funnel
- Spoon
- Hot plate or in double boiler or pan+skillet
- Mortar and pestle
- Sunny windowsill
Sterilize the glass jars and bottles that you will be using by running them through the dishwasher or better, in a sterilizer. It is important that they are completely dry.
Culinary infused oils are a great way to add flavor to your cooking. An assortment of herbs and spices can be used depending on your tastes and cooking style. You can use either fresh or dried herbs. Fresh herbs will give a stronger flavor but the oil won't keep as long and will need to be stored in the refrigerator for up to one week (see note below**).
Suggestion: make small quantities of infused oil at a time so that it will be used up quickly.
Here are a few suggestions of herbs and spices, don't be afraid to mix and match:
|
Basil |
Clove |
Oregano |
Peppercorns |
|
Garlic |
Rosemary |
Tarragon |
Sage |
|
Chilies |
Coriander |
Thyme |
Cumin |
The best type of oil to use is extra virgin olive oil, you can also use grape seed , peanut or sunflower oil. Walnut oil is also good if it will be used cold such as for salad dressings since it is not good for heating.
Step 1. Prepare your herbs
- Wash your herbs and dry completely**
- Bruise or rub herbs, for spices toast them to bring out the flavour
- Place in a clean dry glass jar.
- Add oil until it completely covers the herbs/spices.
- Place a lid on the jar and close
- Place the jar on a sunny windowsill or other sunny spot. Swirl or shake the jar every day or so.
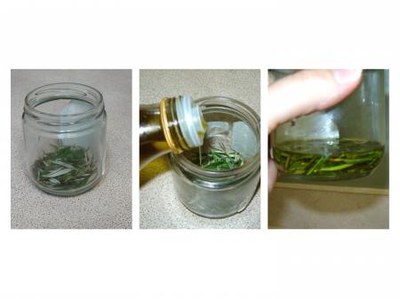
**It is important that no moisture is introduced into the oil as it can become rancid or prone to mold or bacteria growth. (Garlic is particularly prone to this so it should be stored in the fridge or made with the heating method in a skillet described in step 4.)
Step 2. Draining and storing
- After a week drain off the oil into a clean dry jar using a sieve (for larger herbs) or cheesecloth or coffee filters.
- Taste the oil to see if the flavor is strong enough
- If you want it stronger add more herbs/spices to the oil, close the lid and place back in the sunny spot for another week.
- Repeat as needed.
- If you are happy with the flavor, pour the oil into a nice glass bottle, you can also add a fresh sprig of herb to make if look fancy.
- Store in the refrigerator (see note below).
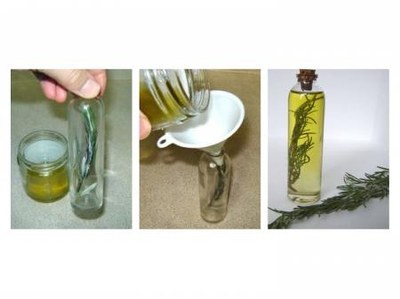
Alternative: Heating method
Heating the herbs/spices in oil is a quicker way of making infused oil and is great for dried herbs and spices since the heat helps brings out the flavor.
- Grind dried herbs/spices with mortar and pestle
- Place into a clean glass jar
- Cover in oil
- Place a lid on top of the jar (don't tighten)
- Place the jar on hot plate or in double boiler or pan+skillet and simmer for several hours
- (about 3hrs - warning: your kitchen will smell wonderful!)
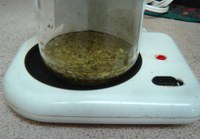
- Taste to see if the flavor is strong enough
- Drain with a sieve or cheesecloth/coffee filters
- Pour into a clean glass bottle, label and store in a cool, dry place.
For spices you can do this in a skillet or pan instead. Heat the oil and spices until the oil bubbles and spices sizzle, it needs constant stirring but should only take about 5 minutes, don't overcook. When ready, strain and pour into a clean glass jar and let cool. When it has cooled taste to see if it is to your liking. Store in a cool, dry place.
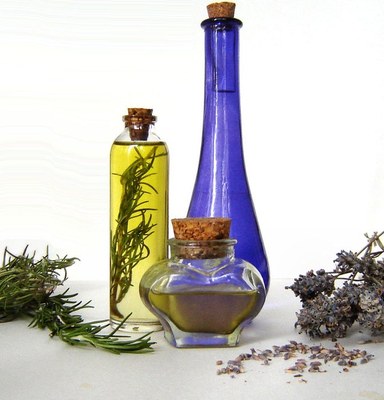
Oil recipe and all photos from by ChrysN at www.instructables.com
A NOTE ON FOOD SAFETY
Keep in mind that infused oils made with fresh herbs are highly perishable, and should ideally be used within about a week, though versions made with dried ingredients will last longer.
According to Jason Bolton, Assistant Extension Professor and Food Safety Specialist at the University of Maine Cooperative Extension, infused or flavored cooking oils can pose potential food safety risks since they are typically made with low-acid ingredients. Fresh herbs (and fruits, and vegetables) may be contaminated with Clostridium botulinum (C. bot) spores, which can cause botulism. And the water found in fresh produce can help this bacteria to grow.
This is one advantage that commercially made products have over the homemade variety. Since they are made with acidified ingredients, they have a better shelf life and can be stored at room temperature without worry.
To cut out the potential for allowing C. bot to thrive entirely, make your flavored oils only with dried herbs. Otherwise, be sure to store your DIY creations in the refrigerator, and use them up quickly.
Vinegar can also be added to lower the pH of blends made with fresh ingredients, but that method is beyond the scope of this article.
4/23/20
THE 6 INGREDIENTS MEAL
Once again, Chef Cyril Rouquet-Prevost created these two recipes especially for the confinement and his Stay At Home Kitchen blog. You are the first ones to see them in English! Take a peek at Cyril's other recipes on https://www.facebook.com/cyril.rouquet (in French).
EGGPLANT A LA PARMIGGIANA
Serves 2.
Ingredients :
- 2 medium-sized eggplants
- marinara tomato sauce
- 50g grated parmesan
Pre-heat oven 360°F.
Wash the unpeeled eggplants, cut them in 1 cm thick slices. Arrange eggplant on a baking sheet. Once you’ve laid out the slices in a single layer, drizzle them with olive oil and season them with salt and pepper. Roast for 10 min.
Don’t turn the oven off. Take the baking sheet out, spread the marinara ton top, then the parmesan on top of the marinara. Put back in oven for another 10 min.
If you have basil and garlic, don’t hesitate to sprinkle some on the roasted eggplants before serving.
Note: This oven roasted eggplant recipe freezes well! After cooking the eggplant, let them cool. Then, you can freeze them in a single layer on a cookie sheet. When they are frozen solid, you can transfer the slices to a freezer bag.
When you’re ready to use your roasted eggplant slices, let them thaw and then re-heat in a skillet or 350 degrees F oven until hot.
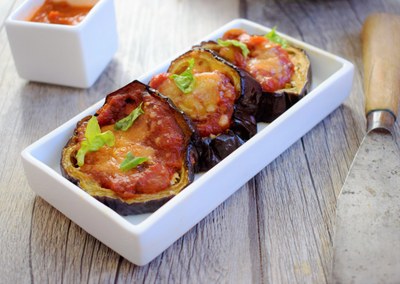
TIP on how to store basil for future use:
You can use frozen basil exactly as you would with fresh leaves. The leaves will shrink as they freeze, so cup for cup, plan to use slightly less than if you were cooking with fresh basil.
1.Freeze basil whole leaves in these 3 easy steps:
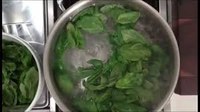
- Blanch: Remove the basil leaves from the stem and blanch them in boiling water for 2 seconds.
- Ice bath: Transfer the leaves to an ice bath.
- Dry & freeze: Dry completely and store in a freezer-safe container, separating the layers with wax or parchment paper.
- Puree and freeze
If the idea of basil vinaigrette, pesto or adding fresh basil to soup or stew sounds exciting, then consider pureeing and freezing fresh basil leaves for later.
Puree and freeze fresh basil in these 3 easy steps:
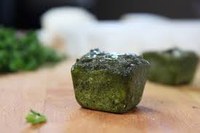
- Prep: Remove the basil leaves from the stem, then wash and dry completely.
- Puree: Use a food processor to puree the fresh basil leaves with olive oil. Use 1 tablespoon of olive oil per 1 cup of basil.
- Freeze: Freeze the pureed basil in an ice cube tray, then store in a large resealable plastic bag or freezer-safe container.
- Dry it
If you like cooking with dried basil, say goodbye to the jars in the spice aisle, because now is the perfect time to dry your own. There are a few different methods, but I like to stick with oven drying because it’s so easy.
Oven dry basil in these 3 easy steps:
- Prep: Remove the basil leaves from the stem, then wash and dry completely.
- Dry: Set your oven to the lowest temperature. Place the basil leaves on a parchment-lined baking sheet, then place it on the upper rack of the oven. Bake for 2-4 hours, until the leaves are crumbly.
- Crumble & store: Remove the basil from the oven and cool. Crumble the basil leaves and store in airtight containers.
ORANGES GIVRÉES
In French, 'givré' (or 'givrée' when feminine... an orange is feminine 😀) has two meanings: 'frosted' or 'crazy'). In my opinion, these oranges are both : frosted AND crazy tasty!!!.
Serves 2.
Ingredients :
- 2 oranges
- 40 g brown cane sugar
- 2oz plain, whole milk yogurt (e.g. Dannon Whole Milk Plain 32oz; or Stonyfield Organic YoBaby Plain - at Plum Market)
Cut small slice of skin from non-stem end of whole oranges so that they stand up straight. Cut 1/2 inch from tops of oranges. Scoop out fruit from each orange and its top. Reserve scooped-out fruit. Freeze the whole oranges (cut-out tops, too).
Mix sugar with the scooped-out fruit. Add yogurt.
Strain the mixture into a roasting pan or baking dish. The dish should be large enough so the liquid is not more than 1-inch deep. As soon as the mixture starts freezing, remove from the freezer and scrape with a fork to break up ice. Return to the freezer and freeze until solid, about 2 to 3 hours, scraping with forks every hour or so. Scoop generously into the orange shells. Cover with top and freeze again until serving time.
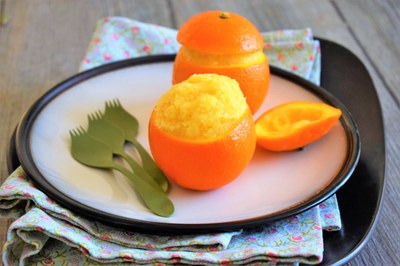
Enjoy your 'only 6 ingredients!' meal!
Translation: Florence Rouquet.
Photos by Cyril Rouquet-Prevost, Real Simple ('blanched basil') and Fat and Happy blog ('basil cubes').
4/13/20
BALSAMIC PEARLS
Would you like to feel like a real mad scientist in the kitchen? How about a little molecular gastronomy?
Molecular gastronomy is a part of food science that attempts to push the edges of the culinary arts. Other terms are: multi-sensory cooking, modernist cuisine, culinary physics, and experimental cuisine.
Today we are going to learn how to make Balsamic Vinegar Pearls, or Balsamic Pearls, with Karine, Foodie, Private Chef, Culinary Teacher and creator of Cuisine a la Karine https://cuisinealakarine.com/ .
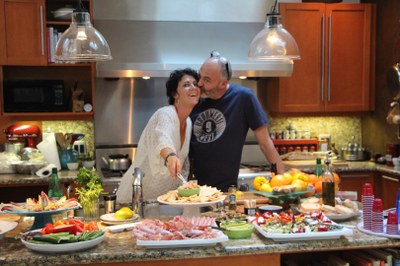
Karine is French-American and has lived all over the world. Cooking has always been her passion; so much so that she became a student again and graduated from a Culinary School in 2018.
Balsamic Pearls are a simple and fantastic way to decorate your dishes! Basically, balsamic vinegar is transformed into tiny jelly balls… But let’s start the magic!
Ingredients
- 1/3 cup Balsamic Vinegar
- 1.5 tsp agar agar (vegetarian gelatin found in Asian section or amazon)
- 1 tall glass of cold olive oil
Instructions
- Get a tall glass and fill with olive oil or any other oil. Place in freezer for 30 minutes – no more, but you want the oil cold.
- Measure the agar agar flakes 1.5 teaspoons or 1 gram if weighing. Measure the balsamic vinegar.
- Add balsamic and agar to a small saucepan and bring to a boil while stirring - turn off heat and let cool slightly. I found using a syringe worked best for more even pearls. You can also use a squeeze bottle, but you need to cool it down even more to not melt plastic squeeze bottle.
- Drip the hot liquid drop by drop using a syringe into the cold olive oil. The taller the glass the easier it is to make little beads. If you are using a squeeze bottle, drip solution across the glass in back and forth motions. Basically don't just squirt in one place - move around!
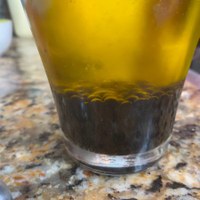
- Once you've used all the mixture-strain the pearls and run under cold water.
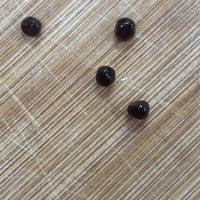
- Store in an air-tight container in the fridge; they should keep up to 2 weeks.
Use on salads, appetizers, in your favorite dishes for a wow factor and a zesty bite!
All photos by Cuisine a la Karine.
4/7/20
FORGET EASTER EGGS! MAKE TRUFFLES
FOR PASSOVER AND EASTER INSTEAD
It is currently difficult to get hold of eggs to do the usual Easter Egg workshop, so why not make something different with your kids (adults welcome, too!) this year?
Here at the library, we did a French Holiday Truffle Workshop in December 2018. Each attendee was able to make and decorate standard chocolate truffles but also a little more unusual, pink and green truffles as well. The ingredients for some of these colorful truffles being too difficult to obtain (ever heard of ‘Biscuits Roses de Reims’???), today, this workshop will be done with simpler ingredients, and because both celebrations are around the corner, more PASSOVER and EASTER oriented: we have found a Kosher recipe for CREAM CHEESE CHOCOLATE TRUFFLES; and a second one which kids will love: TIGER LILY TRUFFLES!
CREAM CHEESE CHOCOLATE TRUFFLES by Kosher Foodies
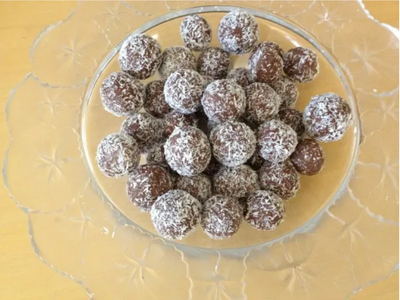
Photo: jamiegeller.com/kosherfoodies
This recipe was found on the following internet site: www.jamiegeller.com ; it says ‘Chocolate Truffles make the perfect Passover dessert. These are made with Whipped Cream cheese for the perfect tang and the perfect texture.’
90 minutes total duration
90 minutes prep time
INGREDIENTS
- 4 ounce Temp Tee Whipped Cream Cheese
- 1 1/2 cup powdered sugar
- 1 1/2 cup semi sweet chocolate chips, chunks or chocolate bar
- 1 teaspoon orange zest
- coconut flakes, cocoa powder, more powdered sugar, chopped nuts, etc. for coating
PREPARATION
1. In a medium bowl, beat together the cream cheese and sugar.
2. Melt the chocolate over a double boiler (or a pot with a heat-proof bowl on top)
3. Add the melted chocolate until well blended.
4. Refrigerate the mixture for about one hour, until set.
5. Roll into teaspoon-sized balls, and then into desired coating.
6. Freeze or refrigerate until ready to eat.
Chag Sameach! Happy Passover!
TIGER LILY TRUFFLES BY BREAD BOOZE BACON
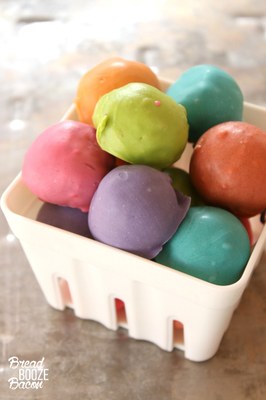
This recipe is really Kids oriented – OREO-based, and super colorful! Says blogger Julie Espy in https://breadboozebacon.com/tiger-lily-truffles/ : “Tiger Lily Truffles are so colorful and fun, you'll never want to grow up! Creating and eating these truffles are fun for anyone, no matter the age! “
Prep Time: 90 minutes
Cook Time: 5 minutes
Total Time: 1 hour 35 minutes
INGREDIENTS
- 15.5 ounce package Golden Oreo cookies
- 8 ounces cream cheese, room temperature
- 22 ounces white chocolate chips, equivalent to two 11 ounce packages
- 3 tablespoons vegetable oil, plus more as needed
- Bright green, red, purple, orange, pink, and teal gel food coloring
INSTRUCTIONS
- Place the Oreos in a food processor. Pulse until cookies become a fine crumb.
- Add the cream cheese to the Oreos, and run the food processor until a dough-like mixture forms.
- Divide the truffle filling into 6 equal-ish portions and place in 6 different bowls.
- Add a few drops of gel food color to each bowl, one color per bowl. Use a spoon to mix the color into the dough until the color is evenly distributed. Add more food coloring as needed until you reach your desired color. Repeat with the remaining truffle filling.
- Use a small cookie scoop (or a tablespoon measuring spoon) portion the colored filling, and then use your hands to roll the filling into balls. Place the truffles on a silicone mat (or parchment) lined baking sheet. Refrigerate for 30 minutes, or until the truffles are firm.
- Place the white chocolate and oil in a microwave-safe bowl. Microwave the chocolate for 30 seconds. Remove from the microwave and stir. Return to the microwave and heat for another 30 seconds. Remove and stir again. Repeat as needed until the chocolate is melted and smooth.
- Divide the chocolate evenly among 6 bowls. Add a few drops of food coloring to each bowl, one color per bowl, and use a spoon to stir in the color until it is evenly distributed. Add more food coloring as needed until you reach your desired color.
- Pair up your colors (I did purple & red, teal & orange, and pink & green). Choose one truffle color and dip in in the opposite chocolate color (ex. pink truffle in green chocolate and green truffle in pink chocolate), use a spoon the make sure the truffle is completely coated. Use a fork to lift the truffle out of the chocolate, and then tap the handle of the fork on the side of the bowl to remove any excess chocolate and smooth out the chocolate shell. Place the truffle back on the baking sheet.
- Repeat with the remaining truffles and chocolate. Refrigerate truffles for 30 minutes, or until the shells are set.
- Keep refrigerated in an air tight container or until ready to serve.
NOTES
If you don't have a food processor, place the Oreos in a gallon ziploc bag, and smash them into a fine crumb. Transfer the crumbs to a mixing bowl. Add the cream cheese and use a spoon to incorporate the Oreo crumbs and cream cheese together until well combined.
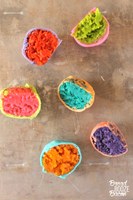
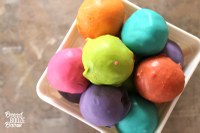
All photos: Bread Booze Bacon
Happy Easter!
4/3/20
NO EGGS NO MILK NO BUTTER CHOCOLATE CAKE
Today you will find an easy recipe for a Chocolate Cake without eggs, milk or butter from French Chef Cyril Rouquet-Prevost, who graciously accepted that we translate and publish a few of his creations (yes, there will be more to come).

Cyril Rouquet-Prevost is a French Award Winning Chef, TV Presenter and Producer, Food Author and Food Consultant. In the aftermath of the 2008 financial crisis, Cyril created a special blog, Kitchen Crise (http://www.cyrilrouquet.com/kitchencrise), where he would post cheap and tasty recipes for people on a budget. In 2010, Cyril participated in the first season of French MasterChef TV series. He now travels the world to participate in many local Cooking TV Shows – he produces and hosts the Plateau Gourmand show on French TV Channel LCI.
During these times of confinement, Cyril had the (renewed) idea, in his blog Stay At Home Kitchen, to help us cook with what we have in our pantries in order to reduce our grocery shopping (a bit of an ordeal these days, don’t you agree?!!) and waste less.
Here is an easy dessert recipe from Cyril’s blog: grab your mixing bowls!
NO EGGS NO MILK NO BUTTER CHOCOLATE CAKE
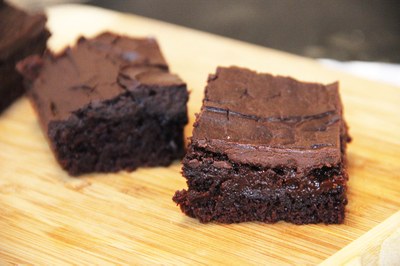
Convert ingredients and oven heat with the following site: https://www.thecalculatorsite.com/cooking/cups-grams.php
This cake is better with orange juice or pear juice instead of water. It’s tastier if you eat it one day after baking – providing you let it cool properly and then wrap it in plastic wrap.
Ingredients
-
200g water (or orange juice, or pear juice)
-
200g flour
- 150g sugar
-
40g rapeseed oil (or canola oil)
-
60g unsweetened cocoa powder
-
7g baking soda (or baking powder)
-
5g white vinegar
-
Option: semi-sweet chocolate chips and vanilla extract
Recipe:
Preheat oven to 180C / 350F.
In a mixing bowl, mix flour, cocoa powder, sugar, baking soda. Add vinegar, water and oil. Whisk. Add vanilla extract and chocolate chips to taste.
Oil a cake tin and pour batter. Bake 35 minutes.
Bon Appetit!

